The Craft:
Miscellaneous:
Adjusting the size
 This is done with
another drill referred to as the chasing drill which is
shown in fig. 14. At first this one is positioned exactly in
the middle of the wooden shoe. As such, sufficient space for
the rest of the foot is created and the hole is made the
right depth.
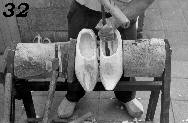
The fitting is made such that it follows the model of the foot (space for the big toe, etc. see photo 32). A proper fitting is of utmost importance because a man should be able to walk in these wooden shoes conveniently and without trouble.
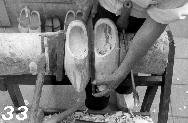 To create this proper fitting, regular
measures need to be taken with the measuring staff. This
measuring staff can not only be used to measure the length,
but on this measuring staff also notches are visible for
measuring the thickness of the edge of the heel and the
thickness of the nose (usually in cm).
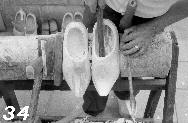 For the pair of wooden shoes shown on
photo 33 the measures are 0.8 inch for the edge of the heel
and 1.2 inches for the thickness of the nose. The latter is
determined by measuring the outside length first and then
measuring the inside by sticking the measuring staff inside
the freshly drilled hole (photo 34). Both measures are
subtracted to determine the thickness of the nose.
For the pair of wooden shoes shown on
photo 33 the measures are 0.8 inch for the edge of the heel
and 1.2 inches for the thickness of the nose. The latter is
determined by measuring the outside length first and then
measuring the inside by sticking the measuring staff inside
the freshly drilled hole (photo 34). Both measures are
subtracted to determine the thickness of the nose.After the wooden shoe maker has created holes with the right and usually equal length in each wooden shoe, he continues with further drilling.
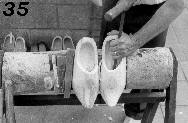 Photo 35
shows how he wields the chasing drill. He has clenched one
hand around the shaft of the drill and with the other hand
he holds the handle. By making rotating moves so to say, he
scoops a bigger hole in the wooden shoe. It is exactly this
activity which in Holland is called 'schrooien',
parbuckling. He now needs to take care that nothing changes
anymore in the length of the hole. This has already be
determined. The chasing drill is also used to scoop out
loose chips.
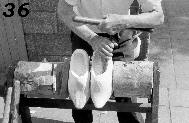
During this drilling a lot of strength is required. Photo 36 again shows again that the fore-arm is used to optimally apply force.
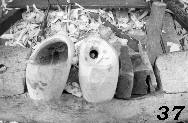 Photo 37
shows how the pair of wooden shoes is fastened in the boring
bench and how the hole looks before and after scooping.
Photo 37
shows how the pair of wooden shoes is fastened in the boring
bench and how the hole looks before and after scooping.One can see at the left wooden shoe how well the shape of the instep has been made. Also the slopes for the toes and toe joints are already visible.


