The Craft:
Miscellaneous:
Blocks are shaped into wooden shoes
 Before the wooden
shoe maker starts to work on the blocks with an oblong knife
(fig 9), this knife is sharpened.
 This is done with a wooden hone, made
of a tough sort of wood like willow. It is about 24 inches
long, 2.5 inches wide and tapers off at the ends.
This is done with a wooden hone, made
of a tough sort of wood like willow. It is about 24 inches
long, 2.5 inches wide and tapers off at the ends.In chapter 10 "In-between sharpening of the tools" it is shown that the wooden shoe maker uses a sun baked whetstone on the wooden hone (photo 38). In doing so, powder like dust remains on the blade which polishes it whilst sharpening and thus becomes extremely sharp.
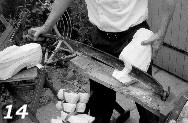
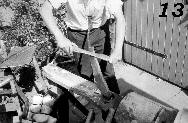
The wooden shoe maker now places one of the blocks against his hip, with the nose of the wooden shoe as close as possible to the hook by which the oblong knife is anchored. The result is a leverage which enables the wooden shoe maker to apply a large force during cutting without having to apply too much effort.
Next, in about 7 cuts, the wooden shoe's nose is shaped into the desired model. To make the right cut, one should not only move the hand that wields the knife correctly. Also the hand that holds the wooden shoe should make the right moves and turns.
 In that case both arms do part of the
work and the wooden shoe maker also doesn't need to make
peculiar moves with the rest of his body.
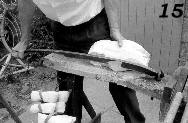
 Then, as shown on photo 15, the right shape of the hood is made. This needs to be done broadside because that way the wood is easier to cut. This is also the easiest way to achieve a good result.
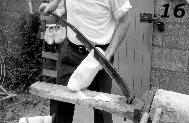
After the heel has been shaped, the beak is made with the oblong knife in the right spot and with the right depth (photo 16).
The beak of the wooden shoe starts for a pair of high wooden shoes at a position a little less than half the total length.
 In fig. 10 again, the measures of the heel
and the beak are illustrated. The space in the tread starts
about 1/3 from the front and stops at 1/3 from the rear. The
beak starts about halfway from the front.
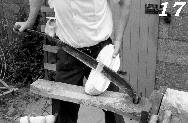 After the beak is finished, the space
in the tread is touched up with the oblong knife. Photo 17
shows how the wooden shoe is held. What isn't shown, but is
very important, is that the wooden shoe maker leads the
moves of the wooden shoe during cutting with his left hand.
As mentioned before, this is a way of working that requires
the least effort and enables cuts that would hardly be
possible without movement of the left hand.
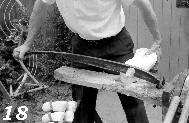 Photo 18 shows
perfectly how sharp the knife should be to be able to cut
perpendicular to the grain of the wood.
Photo 18 shows
perfectly how sharp the knife should be to be able to cut
perpendicular to the grain of the wood.The first wooden shoe is created so to speak "out of the
hand". The wooden shoe maker can and should measure things
like the length, width and height, but at this stage he is
following no other fixed measurements.
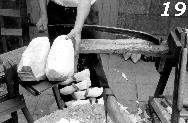 Photo 19
shows a pair of wooden shoes under construction with a width
of 6 inches and a height of 4 inches. One can expect that
they will shrink about 2/5 to 3/5 of an inch in width. In
height they shrink very little and in length close to
nothing. The thickness of the sole should be such that a
life span, the wearing time, of 3 to 4 months is guaranteed.
In practice that means a thickness of 1 to 1.4 inch.
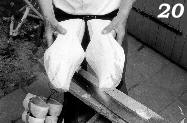 Whilst shaping the second wooden shoe,
among other things, the beaks are compared. They must be
equal and large enough because soon the hole will be bored
that should allow the foot to slip in (photo 20).
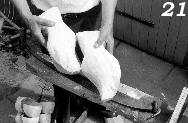
Also the beak and the hood are mutually compared (photo
21). These are almost equal in size but identical for both
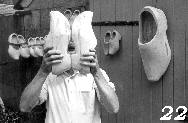
wooden shoes.
